Create Interactive Prototype with ForeUI
Examples in this article: Example1 Example2 Example 3 Example 4
From V1.20, ForeUI provides an exciting feature: Interactive Simulation. That means what we created with ForeUI is not just screen mockup, it can run and provides real user experience.
How to make the screen mockups become interactive prototypes? That's quite easy in ForeUI - just define the behavior of the elements, then they will work as you expected during the simulation.
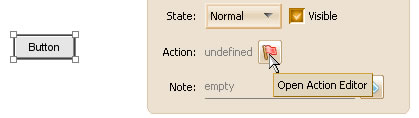
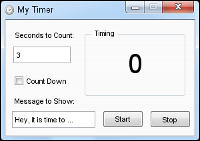
For example, we want to define the behavior of a button. After dragging a button element into the plot, we will see the floating tool pane for the button (see the figure below). At the bottom of the tool pane we can see a row named "Action", it is for the behavior configuration. We can click the button with red flag icon to open the behavior editor.
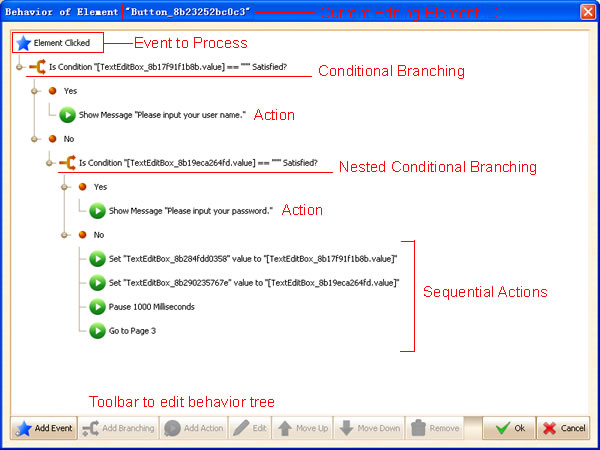
The figure below shows the window of behavior editor. In the behavior editor, the behavior of element will be managed as one or more tree structures. Each tree trunk starts with an event, which is followed by actions or branching. The tree structure represents the workflow of the event handler.
Example 1: Hello World Button
Now let's create a simplest action to our button: popup a window to say "Hello World!" when we click the button. The steps will be:
1. Open behavior editor for the button.
2. Click the "Add Event" button in the toolbar and choose the "Element Clicked" event.
3. Click the "Add Action" button in the toolbar and choose the "Show Message" action.
4. Input the message "Hello World!" in the popup window, click "Ok" to finish.
After these steps, the behavior tree should looks like this:
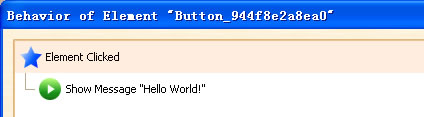
Now let's run this simplest example, just
click the ![]() button in the toolbar of the ForeUI window, or launch the simulation from
menu "Prototype->Run Simulation". You will see a browser
window popped up with our button, clicking the button will bring up a
message "Hello World!". You can view
this online example to see the result.
button in the toolbar of the ForeUI window, or launch the simulation from
menu "Prototype->Run Simulation". You will see a browser
window popped up with our button, clicking the button will bring up a
message "Hello World!". You can view
this online example to see the result.
Example 2: Branching the Workflow
Now let's make something more interesting: branch the workflow and let user to decide which branch to go. Here are the steps:
1. Open behavior editor for the button and add the "Element Clicked" event.
2. Click the "Add Branching" button in the toolbar and choose the "User Decision Branching".
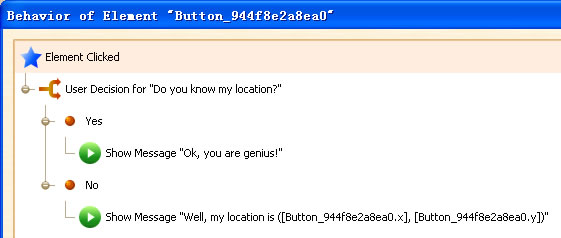
3. In the popup window, we input the question that will prompt user: "Do you know my location?".
4. Choose the "Yes" node and click the "Add Action" button to add a "Show Message" action, with a praising message.
5. Choose the "No" node and click
the "Add Action" button to add a "Show Message" action.
In the popup message edit window, we click the ![]() button to insert two properties to represent the current location of the
button. The property chooser will popup after the
button to insert two properties to represent the current location of the
button. The property chooser will popup after the ![]() button is clicked:
button is clicked:
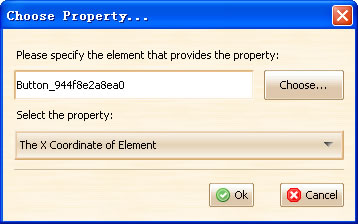
With the help of property chooser, we can find the element and choose the property that is supported.
The final behavior tree should looks like this:
Now we can run the simulation, it shows how branching works and the ability to access the element property. You can view this online example to see the result.
In this example we use the "User Decision Branching", which branch the workflow according user's decision. Actually ForeUI also support "Conditional Branching", which can do branching silently according to the conditions.
Example 3: Control Element in Realtime
ForeUI simulation is not just a page-by-page browsing, it support controlling the elements on screen in real time. ForeUI provides a set of actions that labeled "Operate on Element". Different elements may support different actions, which can control them during the simulation.
Now let's make an interesting example: move the button a little upper at each time we click it. Step by step:
1. Open behavior editor for the button and add the "Element Clicked" event.
2. Click the "Add Action" button and choose "Operate on Element".
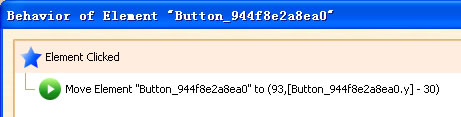
3. In the popped up action chooser, specify an element and then select the "Change Location" action. We can input the parameters for this action. In our case, the x position should not be changed, we set the y position to [currentY - 30], so that the button will move upper every time we click it.
The final behavior tree should looks like this:
Now let's run it, it works as we expected! Each time we click the button, it move up a little, that's funny. You can view this online example to see the result.
Example 4: Using Loop in Simulation
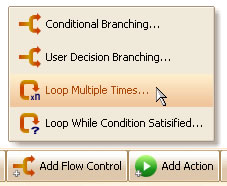
From V1.25, ForeUI support two kinds of loop:
Things become more and more interesting, right? Let's make an example that us loop. Step by step:
1. Drag a Button and a TextBox to the plot.
2. Open behavior editor for the button and add the "Element Clicked" event.
3. Click the "Add Flow Control" button and choose "Loop While Condition Satisified...".
4. Input the condition, let's set it to "x position of button larger than 100", like this:
5. Add pause action to the loop, delay 100 milliseconds.
6. Add move action to the loop, move the button to left, 10 pixels each time.
7. Add set text action on TextBox to the loop, set the text to the x position of the button.
The final behavior tree should looks like this:
We can run it now. When we click the button, it keeps moving left a little until its x position equal or less than 100. You can view this online example to see the result.
Conclusion:
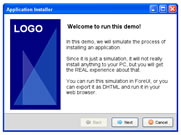
With the facilities provided by ForeUI, we can create interactive prototype with real logic. The simulation can be exported as DHTML and uploaded to the web site, it is a good way to demonstrate future product and collect feedback from potential users.
Here are some completed examples created with ForeUI, some of their .4ui files are enclosed in the installation package of ForeUI (others can be found here):
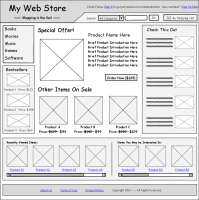
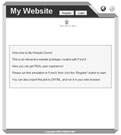
Please note that the look and feel in simulation is the same with that in design. If your design is in wireframe theme, the simulation will keep the wireframe look and feel; If you use Windows XP theme in your plot, the simulation will have XP style as well.