Quick Tutorial: Make Working Prototype with ForeUI
ForeUI has the ability to create working prototype. A working prototype allow you to click on some elements or input content during the simulation, thus provides the real experience that very close to the final product.
Here's a short tutorial to help creating such a working prototype, it is very simple, even too simple to be regarded as a working prototype, yet the process to create such a prototype will cover all concerned aspects.
Let's create a menubar, when we select its first item ("File"), it will bring up a menu; when we choose another item, the menu will be hidden. You can check this demo to see what we are planning to do.
Now let's implement it step by step:
1) Drag a Menu Bar element into the plot
2) Drag a Menu element into the plot and set it invisible (so it will
be hidden when start simulating)
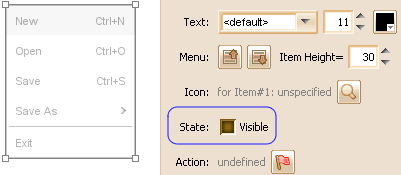
3) Select the Menu Bar element, click the button with
red flag icon to define its action.

4) In the popup window, click the "Add Event" button (on bottom left) and choose the "Selection Changed" event to handle.
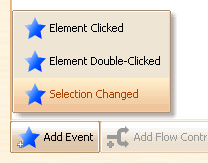
5) Then you will see the event is added and selected like this:

6) You can click the "Add Flow Control" button (on bottom) and choose the "Conditional Branching" to add. This allow you to create different actions regarding to the condition.
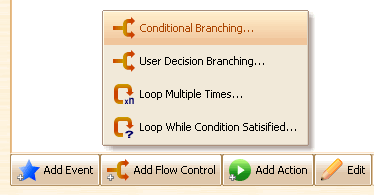
7) Then you will see a popup window which allow you to edit the condition express:
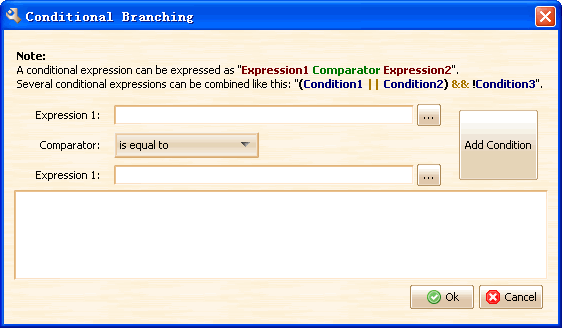
8) You can click the "..." button to insert
some properties provided by element. In this example, we need to check
the selected item index of Menu Bar element, so we click the upper "..."
button:
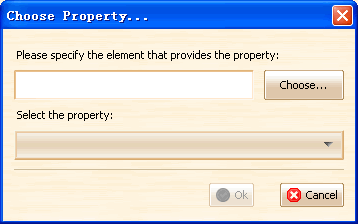
We can click the "Choose" button to pick an
existing element, then select the property in the drop-down list, like
this.
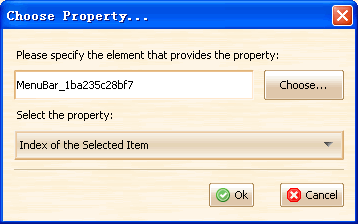
After clicking "Ok" we will return to the condition
editor dialog.
9) We need to check if the selected item is the first item, so we can
add the condition like this:
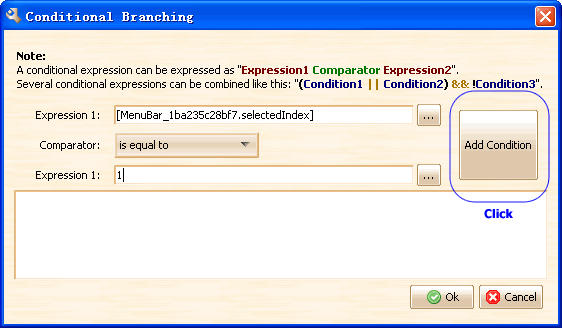
Click the "Ok" button to return to the action
editing dialog.
10) Now we have this:
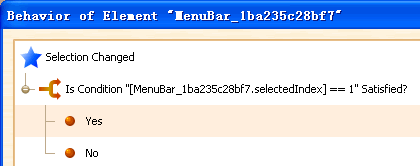
As you can see, there are two branches: "Yes"
and "No", we can define different actions for them.
11) Select the "Yes" branch and click the "Add Action"
button at the bottom and choose "Operate on Element..."
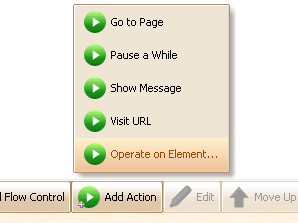
12) Now we can define how to treat with the Menu when
the first Menu Bar item is selected.
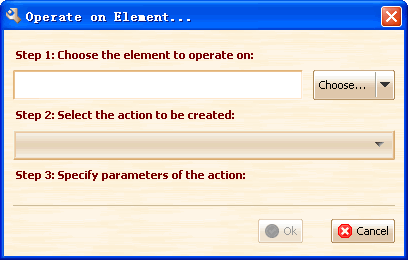
We need to pick the element to operate on, choose the
action from the list and then full fill the parameter for the action.
Here is what we need in this case:
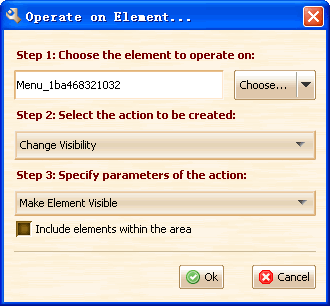
All right we can click "Ok" button and return
to the action editor dialog.
13) We can select the "No" branch and define the action, let's
hide menu at this time:
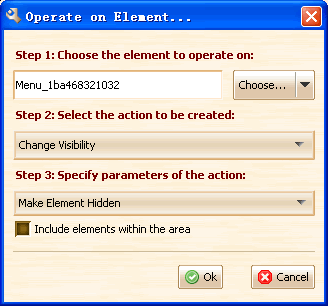
14) Finally we have a behavior tree like this:
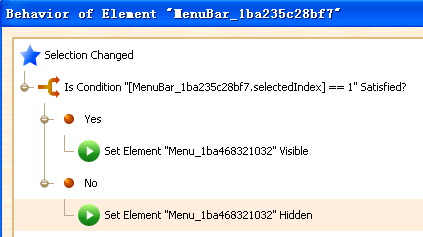
15) Save the plot, and then click the "Run Simulation" button to run it. You should be able to get the same result with this demo.