Use Customized Element for Prototyping
If you have tried ForeUI V1.20, you will find a new element category named "Customization". It is to list the user customized elements. Different than other element categories, "Customization" category is not "readonly", its content can be managed by the user. The elements in this category is created by users, they can be reused as many time as you need.
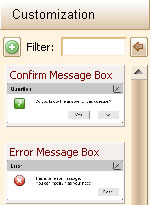
The two figures below shows the UI of "Customization"
category. Comparing with other element categories, "Customization"
category provides an additional button ![]() ,
which can bring up a menu to add customized element to the category.
,
which can bring up a menu to add customized element to the category.

So far there are two options in the menu: Add Current Selection as Element & Add Element from File.
Add Current Selection as Element
This option will create a new customized element with the current selection in editing area, and then add it into the category. Before creating the element, we will be asked for inputting some information about the element:
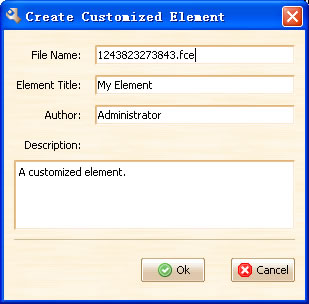
Here we can specify the basic info of the element, also we can input the name of the file to save the element. The element will be saved as "<FCE_DIR>/filename.fce" file, where the <FCE_DIR> is the "customize" folder under the installation directory. The new created element will be added to the category and be shown immediately. You can now drag the new element into any plot.
When we right click the selection in editing area, there
is a "Create Customized Element..." item in context menu, it
has the same effect than clicking the ![]() button.
button.
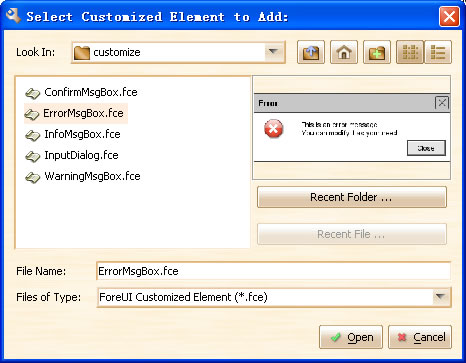
Add Element from File
Actually this option will not create any new element, but it allow you to load an existing ForeUI customized element file (*.fce) and add it into the category immediately. So it is possible to download some customized elements from internet and use them in your own design. We can also preview the element during the selecting:
Use Customized Elements
We can use the customized elements just like the standard elements. We can filter them with keywords, or drag it into our plot. There is no difference between standard elements and customized elements during usage.
Manage Customized Elements
Once an element has been added to the "Customization" category, we can manage it with its mini tool bar. The mini toolbar of customized element will be displayed when you move your cursor over it.
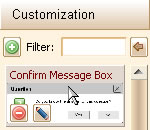
You can click the ![]() button to remove the element from the category. It will not remove the
.fce file so you can load it back latter.
button to remove the element from the category. It will not remove the
.fce file so you can load it back latter.
You can also click the ![]() button to edit the element information.
button to edit the element information.
Behavior of the Customized Element
The customized element is not just a set of standard elements, it can have its own behavior. Once we define the behavior of an element and create a customized element with it, the customized element will keep the behavior, and it will work as expected when we drag the customized element to another plot.
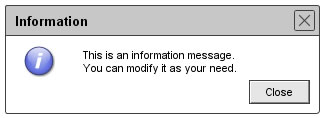
After installing ForeUI, there are some predefined elements in the "Customization" category. They are some message windows and they have behavior. You can drag them to your plot and run the simulation, you will find that clicking the "Close" button can really close the message window.
To learn how to define the behavior of element, you can read this article.
Conclusion
ForeUI allow you to create customized element from the current selected elements in the plot. You can add, edit or remove the customized elements in the list. Each customized element can have its own behavior, you can create functional components and keep it for future usage.