If you are just using ForeUI to create a GUI mockup, you could just ignore the usage of expression. By using correct events and actions, you can make some interactive HTML5 simulations without using any expression. However, if you want to define more complex behavior for your prototype, you will have to use expression, more or less.
What is Expression?
Expression is a snippet of text string in specific format, and could be parsed to Javascript code in HTML5 simulation. In ForeUI, we have system properties, element properties and custom properties, and an expression may contain one or more properties. When you export your plot to HTML5 simulation, the properties in expression will be converted to a Javascript function call, and its value will be return by that Javascript function.
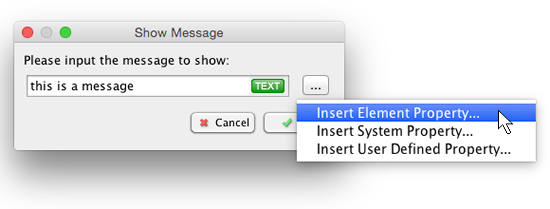
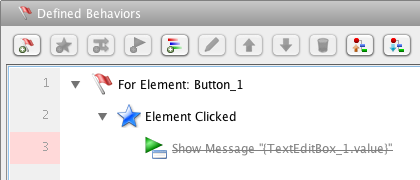
When you define behavior for your prototype, if you see a “…” button next to a text input box, it means that text input box accepts expression, and you can insert property into it. For example, when editing the “Show Message” action, you can click the “…” button to insert a property into the message you are editing.
A property will look like {“PropertyName”}, and it will be replaced by the actual value during the HTML5 simulation.
Parsing Mode
Since V4.0, ForeUI supports two different parsing modes for expression:
- TEXT: the entire expression is regarded as a text string. Besides parsing the properties, other parts of the expression will be quoted with double quote marks and connected with plus sign.
Example: This is the value of a : {a} => “This is the value of a: “+getProperty(“a”) - EVAL: only the properties in the expression will be parsed, and the rest parts of the expression will keep as they were.
Example: 31-Math.max({“a”},12) => 31-Math.max(getProperty(“a”),12)
So if an expression is in TEXT parsing mode, you could not make any calculation, instead you are just building a text string, with or without property values. While in EVAL mode, you can make calculation, and call Javascript functions in the expression, it is just like coding directly in Javascript, only the properties are written in special format (and they will be replaced by getProperty() function call in the simulation).
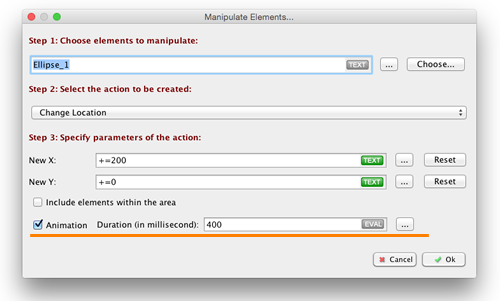
In the text input box that accepts expression, you may see ![]() or
or ![]() icon on the right. Clicking on it can toggle the parsing mode between TEXT and EVAL. Sometimes the text input box can only accept one parsing mode, in that case the icon will get gray and you can not toggle the parsing mode.
icon on the right. Clicking on it can toggle the parsing mode between TEXT and EVAL. Sometimes the text input box can only accept one parsing mode, in that case the icon will get gray and you can not toggle the parsing mode.
TEXT mode could be taken as a subset of EVAL mode. You can always write an expression in EVAL mode to replace one in TEXT mode. In the above example for TEXT mode, we can use “This is the value of a: ” + {“a”} in EVAL mode to get the same result in HTML5 simulation. So why do we need the TEXT mode at the first place? Because it is simpler, not that easy to make syntax mistake, and is powerful enough in the major of cases. In TEXT mode, we just write the text you want to display, and use properties in the places you need.
You may already noticed that, properties in TEXT parsing mode don’t have quote marks with their names, while the properties in EVAL parsing mode do. It is because in EVAL mode, when you write something in the expression, ForeUI doesn’t know if it is a string, or something that needs to be evaluated (calculation or function call), so you need to explicitly use quote marks to tell ForeUI “this is a text string”. When you click the TEXT/EVAL icon to toggle the parsing mode, ForeUI will add/remove the quote marks for you.
If you input a property in EVAL mode and you forgot to add quote marks to its name, the diagnose engine will take it as an error.
Although it is not required to add quote marks to property name in TEXT mode, adding them doesn’t break anything (the parser will accept that). So if you are not sure, always add quote marks to property names, and it will be safe.
Preview the Parsing Result
If you have some knowledge of Javascript syntax, previewing the parsing result will help you to make sure what will happen in the simulation. This preview feature is newly added since V4.0, and can show you how the expression will be parsed and what code will be generated in HTML5 simulation. Hovering your mouse cursor over the text input box, and you will see the preview in tooltip.
The parsing preview will take the current parsing mode into account. In the example below, “Math.sqrt(” will not be regarded as text string, because it is in EVAL parsing mode.

Casting Property to another Type
ForeUI supports 4 kinds of data types: Number, String, Array and Object. When exporting your plot to HTML5 simulation, properties in these data type will be converted to corresponding variable in Javascript.
Since Javascript is weakly typed language, usually you don’t have to cast a variable from one type to another. However, there are still some exceptions. For example, if you want to add two variables together, the type of variable does mater: 1+2 gets 3, while “1”+”2″ gets “12”. In ForeUI, a property equals to a Javascript variable, so the situation will be the same, you may want to cast a property to another type, occasionally. How to do it then?
It is simple, using a capital letter N/S/A/O at the beginning of the property can declare which data type should the property be cast to.
- N{“a”} means casting property “a” to a number
- S{“a”} means casting property “a” to a text string
- A{“a”} means casting property “a” to an array
- O{“a”} means casting property “a” to an object
Below is an example of using type casting:
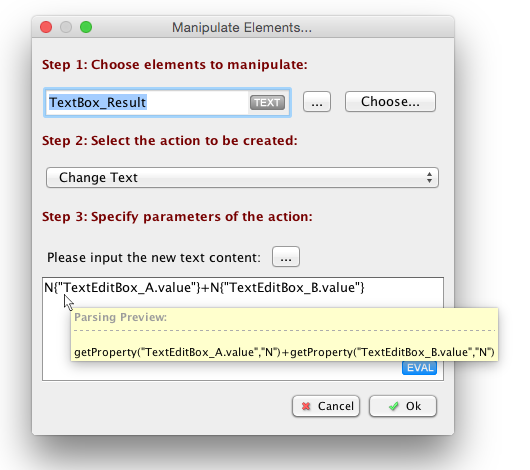
As you can see in the parsing preview, an “N” parameter is appended in the getProperty() function call, and that will do the type casting.
Conclusion
ForeUI V4.0 enhances the expression a lot by clearly separating two parsing modes, and allows data type casting. By correctly using these new features, you can make calculation and function call in the expression, and define complex logic with just one expression. Do you still remember that? In older versions of ForeUI, you must use some temporary properties to store intermediate variables for the calculation, just because of the lacking of EVAL parsing mode and the data type casting. Now we already have all these in ForeUI, and you can really create something cool with very few effort 🙂