ForeUI is an easy-to-use UI prototyping tool, designed to create mockup / wireframe / prototypes for any application or website you have in mind.

Archive for May, 2012

ForeUI V3.0 Beta Released

3

As I remember, ForeUI V2.xx has entered the maintenance phase for about one year, which means we have not added new features into ForeUI for a year.  After so many effects, we finally released the ForeUI V3.0 beta!  Now you can download it here, and feel free to let us know your feedback.

It is recommended to use the new version to create a new project.  If you want to use it on previously created project, please backup your data beforehand.  Remarks: we are still working on the documentation and resource store.

The new version offers many new features and enhancements, my previous posts (this, this, this and this) just introduced a few of them.  So today I will continue my introduction of V3.0.
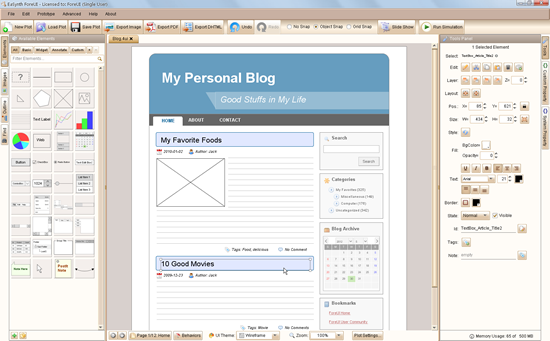
All tool windows are docked on left, right and bottom side, and you can use hotkey to show/hide them.  If you have ever used previous version of ForeUI, you will find that the GUI of V3.0 becomes even simpler.  For example, the element list on left side is simplified: all elements are listed in one panel and you can use tags to filter them.  There are many enhancements like that, and you will see.

From this version will will see a new element named “Polygon”, which allows you to create special shapes.  When you drag the element into editing area, or click the element and then click in the editing area, you will start drawing the polygon.
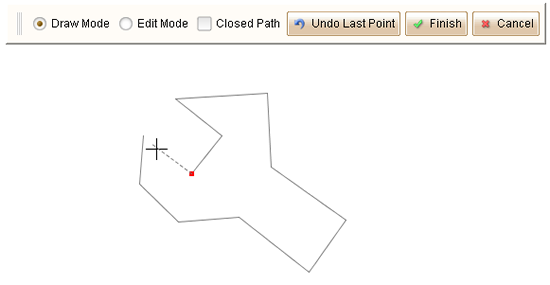
You can edit your polygon with “Draw Mode” (click to create new node) or “Edit Mode” (draw to move any node).  After clicking the “Finish” button you can then configure its background color and border color etc.
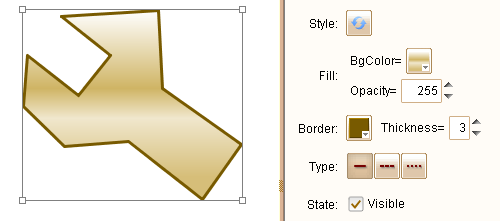
As you can see, with this flexible polygon element, you can define special shapes on your web/software UI.

Hope you will like V3.0 beta, and I will continue introducing new features next time.  If you are interested, here is a list of new features and enhancements in V3.0 beta.

As for the license, if you purchased your license for less than one year, you will be able to use your license key on V3.0.  Otherwise you will need to re-order the new license key for it (the price is raised now).

ForeUI V3 Forecast 4: New Action Editor

1

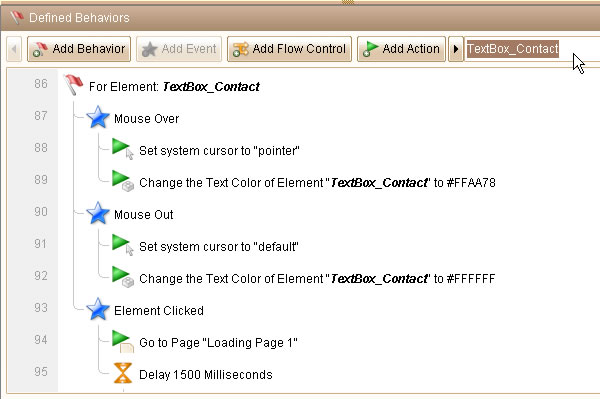
The coming ForeUI V3.0 will use a new GUI framework that allows moving, resizing and docking of any view.  That will definitely make better usage of the screen space.  In V2.xx, the action editor is not visible until you press Ctrl+D or explicitly show it by clicking menu or button somewhere.  From V3.0, the action editor becomes a dock-able view, which will be docked at the bottom of the GUI.  Thus you can review the behavior definition and GUI layout at the same time.

Different than V2.xx, this view is not showing the behavior for just one element or one page,  it will list the behavior for all elements and pages instead (when no filter is applied).  So it is possible to review all behavior definition in the plot in this view.  The cost is that you will need to specify the owner of the behavior first.  ForeUI will support two kinds of behavior owner in 3.0: element and page.  In the future, ForeUI will support more owner types, such as tag (elements that has the given tag).

On the top right corner of this view, you can input any keyword to filter the behavior list.  Only the definitions that contains the keyword will be shown, the keyword will be highlighted in the list as well.

An important improvement is that you can defined the behavior for multiple elements at the same time, just choose multiple elements as the behavior owner:

Thus they will have the same behavior when the same event is triggered on them.  Also you will be able to manipulate multiple elements at the same time, just choose them together as the target of the action.

The new action editor even has the ability to detect errors.  If you defined an event handler for an element, and delete the element later, you will see the event handler will not take effect and is marked as deleted in the view.

This feature can reduce the errors on expression, and avoid (most of) the Javascript errors in simulation.

That’s the new generation of action editor, hope you will like it 🙂

ForeUI V3 Forecast 3: Toolbar in Simulation

2

My previous two posts (this and this) are about the new features that will be available in V3.0.  Today I will continue the forecast.  I would like to introduce another exciting feature of ForeUI V3.0: toolbar in simulation.

From V3.0, your generated DHTML simulation can have an optional toolbar, which provides the page navigation and property viewing features.  When you launch the simulation in web browser, the toolbar looks like this:

The toolbar can be docked to any side of the screen.  You can choose the dock side on the right of the toolbar.  You can also pin/unpin the toolbar, the unpinned toolbar will be hidden automatically if you don’t manipulate on it for a while.

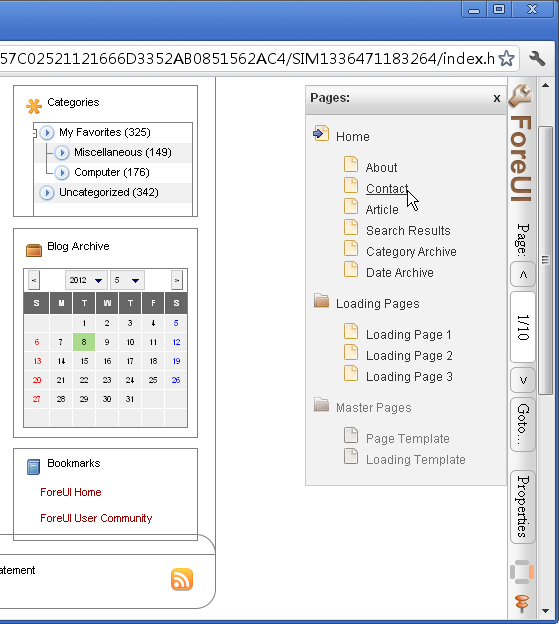
Clicking the “<” and “>” buttons can navigate to previous or next page in your prototype, you can do so by pressing PageUp and pageDown as well (this has been supported in V2.x).  The “Goto…” button can show you all the pages in your prototype and you can choose one to switch to:


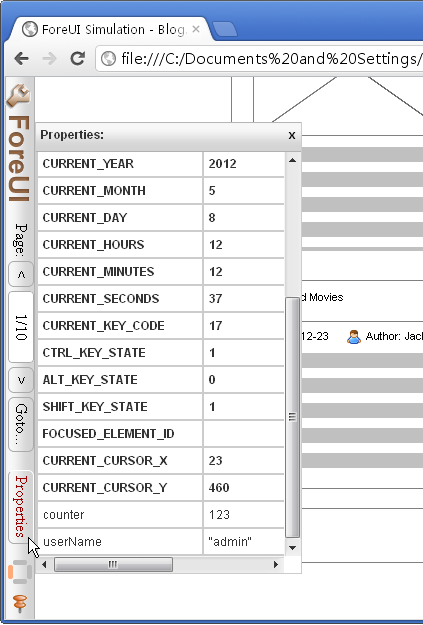
When you click the “Properties” button, the property view will be shown on the screen, and you can watch all properties (including system properties and custom properties) in your prototype:

The properties in bold font is the system properties and those with normal font is the custom properties.  This property view is dynamic, the values in the view will be updated as soon as the property value is changed.

This is the toolbar you will see in the V3.0, and it is just a beginning, we will keep adding new features into the toolbar in the subsequent versions.


ForeUI V3 Forecast 2: Gradient Fill

1

Last week I wrote a post to forecast the Reference element in V3.0.  Today I will introduce another important feature of coming new version:  gradient fill.  In ForeUI V3.0, gradient fill will be supported by all elements, in both editing and simulation.

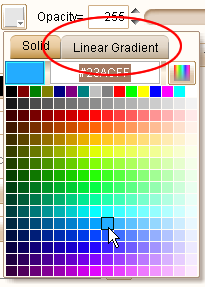
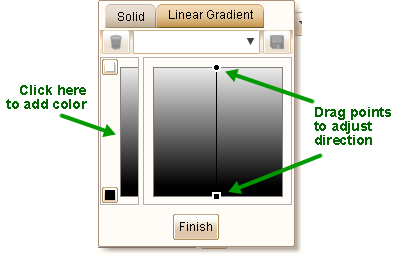
When you try to change the background color for element, you will notice there is a new tab named “Linear Gradient”, which allows you to fill the background with gradient color.

In the “Linear Gradient” tab, you can add new color by clicking on the left area, or drag existed color out of the area to remove it.  Dragging the end points of the line can adjust the direction of the gradient fill.

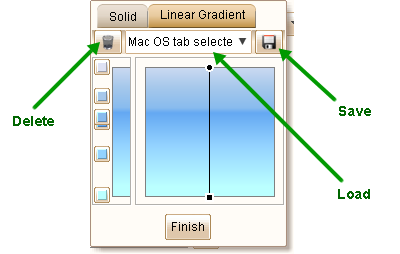
The most interesting part is that you can save your gradient color for future usage: just input the name of the gradient color and click the save button.  The drop-down list on top allows you to load predefined gradient color.  If you don’t want to keep the gradient color, just click the button with trash icon to remove it.

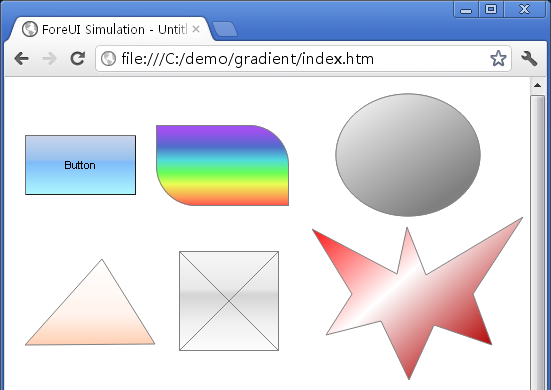
The gradient color can be applied on any element.  Button, rectangle, placeholder, triangle, ellipse, polygon…  The gradient fill effect will be kept when you run the simulation, which is really cool.

That is gradient fill, wish you would like it 🙂