ForeUI is an easy-to-use UI prototyping tool, designed to create mockup / wireframe / prototypes for any application or website you have in mind.

Archive for November, 2009

ForeUI V1.80: New Events and Interactive ComboBox

Hi everyone, I’m here to proudly announce that ForeUI V1.80 is released today! This version bring us two new events and interactive ComboBox element, with some bugs fixed.

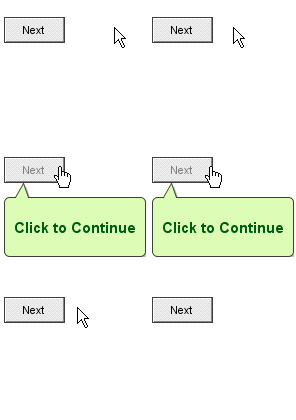
MouseOver and MouseOut Events

Now you can use these two new events in the behavior editor, they will be very useful to implement tooltip or element rollover effect.  The MouseOver event will be fired when you move your mouse cursor over the element; and the MouseOut event will be fired when you move your mouse cursor out of the element’s area.
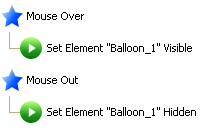
 mouseoverout_actions  MouseOverOut

Interactive ComboBox

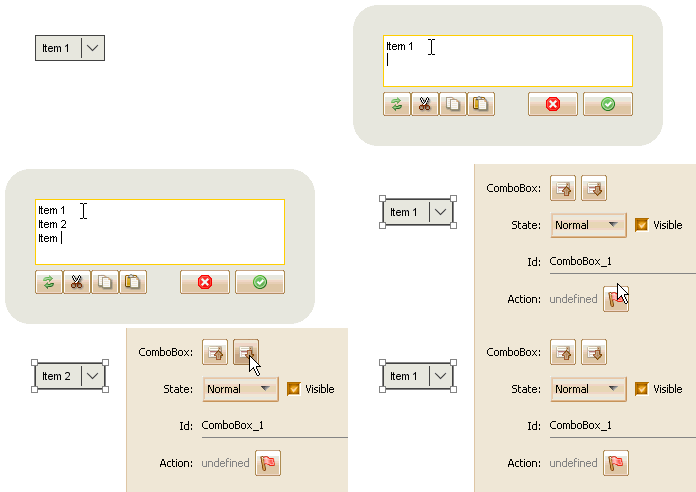
The ComboBox element is improved a lot in this update, it is no longer an image during the simulation, you can now interact with it.  In order to support multiple items, ComboBox element can have multi-line content now, one row for one item, you can assign the default selected item in edit mode.

Edit_ComobBox

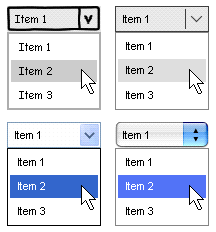
When you run simulation, you can click the ComboBox and then the drop down list will be poped up, the ComboBox will have different appearance according to currently used UI theme.
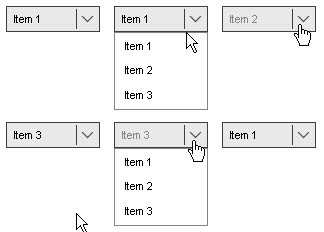
 ComboBox_Simulation  ComboBox_Themes

Other Enhancements

We changed the default state for newly created radio buttons and checkboxes, this is suggested by Ulrich and we really think the “Normal” default state is more reasonable.

Fixed Bugs:

Bug_0114: Can not add more cases after defining the switch branching.  (Thanks Trevor Keegan for reporting)
Bug_0115: The “Element Clicked” event should also be fired when clicking on the Menu element. (Thanks Trevor Keegan again for reporting)
Bug_0116: Should not allow changing plot via Undo/Redo when editing element content.

Trial Duration Changed

BTW, the trial duration is changed to 15 days from this version, you can still contact us to extend the trial for another 30 days 🙂
Some Tips for Behavior Definition

1

With ForeUI we can define actions for each element, thus we can create interactive prototype and run simulation in web browser.  The behavior of element can be described as one or more event handlers, each handler is a flowchart that indicate the way to perform actions.  Here are some tips to help defining a clear and effective flowchart.

Don’t Place Pause Action at the End

The Pause action will pause the current thread and wait for a while before executing the subsequent actions.  In other words, Pause action can delay the subsequent actions. So if no action is defined after the Pause action, the Pause action will not really take effect, even if you place it in a loop, the Pause action will not pause anything in the next circle.

So placing the  Pause action at the end is not a good idea, the table below show some good and bad cases:

Good Cases Bad Cases
  • Event
    • Pause 1000ms
    • Action A
  • Event
    • Action A
    • Pause 1000ms
  • Event
    • Action A
    • Pause 1000ms
    • Action B
  • Event
    • Action A
    • Action B
    • Pause 1000ms
  • Event
    • Loop
      • Pause 1000ms
      • Action A
  • Event
    • Loop
      • Action A
      • Pause 1000ms
  • Event
    • Loop
      • Action A
      • Pause 1000ms
      • Action B
  • Event
    • Loop
      • Action A
      • Action B
      • Pause 1000ms

Use Only One Pause Action In the Loop

When you are defining animation, Pause action will be very useful.  Sometimes we need to place the Pause action in a loop.  But there is a limitation: if you place multiple Pause actions in one loop, the loop will not really work.  So please use one Pause action in one loop.  The table below shows a good case and a bad case:

Good Case Bad Case
  • Event
    • Loop
      • Pause 1000ms
      • Action A
      • Action B
      • Action C
  • Event
    • Loop
      • Action A
      • Pause 1000ms
      • Action B
      • Pause 1000ms
      • Action C

If you really need the behavior showed in the bad case, you can use this structure to workaround:

Case to Workaround
  • Event
    • Loop
      • Pause 1000ms
      • Switch
        • Case A: Action A
        • Case B: Action B
        • Case C: Action C

Thus you can perform one action in one circle, with one second interval.

Make Good Use of Copy and Paste

The behavior editor is improved a lot in V1.70 and provides copy and paste feature.  You cut, copy or paste item in the behavior tree via the context menu.  You can do these cross items, cross events, or even cross elements. That will a lot of time when you try to define similar behavior for multiple elements.

behavior_tree_context_menu[1]

Of course you can also use drag and drop to move or copy items in the behavior tree.

behavior_tree_dnd[1]

ForeUI V1.77: Arrow Line and Alternate Row Color

Hello my friends, today we just released ForeUI V1.77!  This version bring us a new Arrow Line element and some interesting features / enhancements.

Arrow Line

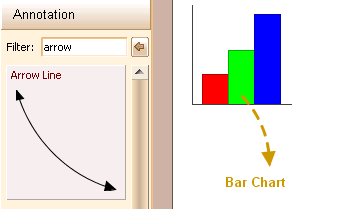
The Arrow Line element is in our TODO list for a long time, and today we finally make it.   Arrow Line is very useful for making annotation on wireframe / mockups, so it is added to the “Annotation” category.

arrow_line2

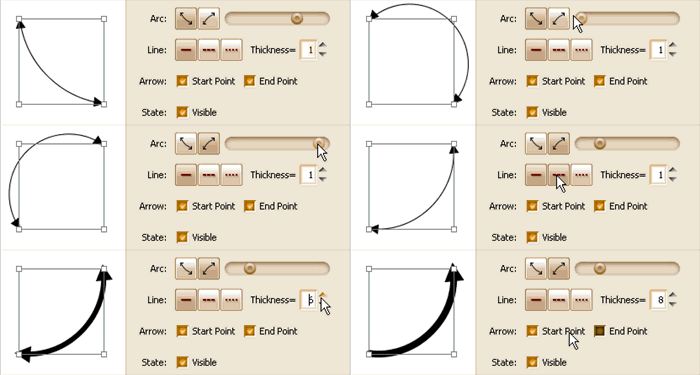
The new Arrow Line element provides many useful options for tweaking, you can change its color, thickness, shape and size etc.  The animation below shows the details:

ArrowLine2

Alternate Row Color for Table/List/Tree

Now you can specify the alternate row color for table, list or tree element.  Here is an animation to show how to do this:

TableRowColors

This feature is requested by  Michael Matti, thanks for the good idea!

Color Picker Enhancement: Clear Color

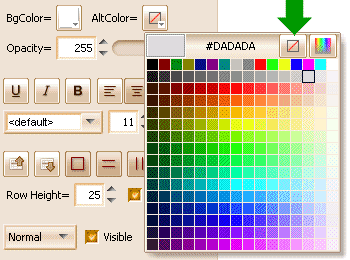
We’ve made a small enhancement of Color Picker, so it can clear the editing color now. 

color_picker_clear

Just click the new button on the top-right corner can clear the current editing color.  This feature is only available for “optional color”, for now only alternate row color belongs to this category.  Once you clear the alternate row color, it’s actual value may vary according to the UI themes.

Fixed Bugs:

Bug_0111: Double-click the .4ui file to open ForeUI, sometimes it may hang.  (Reported by Michael ScolaVisa, thanks!)
Bug_0112: The group element can not be smaller than 20×20, ignoring its content’s actual size.
Bug_0113: Press Page Up/Down to switch page should not scroll the plot as well. (Reported by Ulrich Bottger, thanks!)

Use Master Page to Ease Prototyping

What is Master Page?

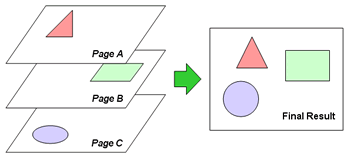
The master page feature is available since ForeUI V1.55, this is a very useful feature since it can simplify your prototype / wireframe a lot. Let me give a brief introduction for master page. Please take a look the the figure below, the master page works like a “background” layer, once you assign a master page to a normal page, the content on master page will be merged into the normal page. What’s more, a master page can be shared by multiple normal pages. That means you can put the common part of the prototype into the master page, thus it can be shared by several pages without copy and paste.

master_page_theory

Although I used “Normal Page” and “Master Page” concepts to identify these two pages, they have no actual difference in ForeUI, they are just pages. In ForeUI, each page can be used as a master page, you can assign any page as the master page for your editing page. So you can assign page B as the master page for page A, and assign page C as the master page for page B, that will form a hierarchy structure like this:

hierarchy_masters

When we export page A or run the simulation of page A, we will see the final result: the contents in both page B and page C are all merged into page A. So you can imagine how helpful will this feature be.

Assign Master Page in ForeUI

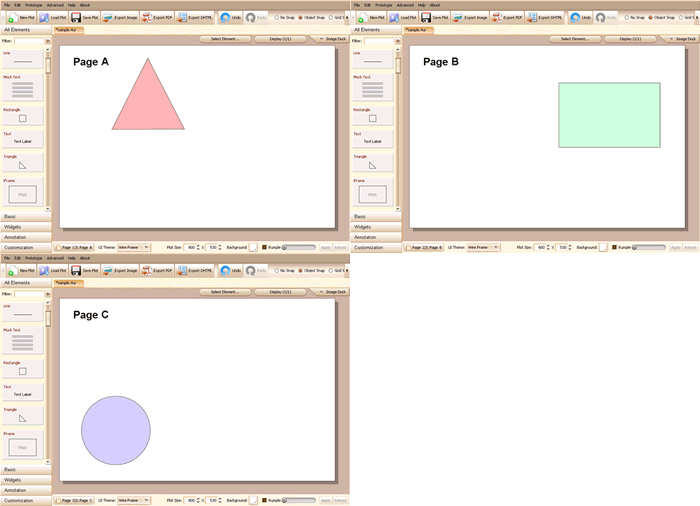
Now let’s see how to assign master page in ForeUI. First of all we need to create three pages, to make things simple I will use the page A, B, C mentioned above for demonstration. Here are the pages I created:

page_abc

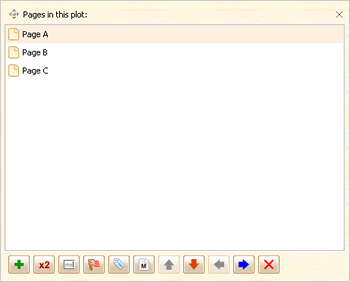
We can click the page_mgr_button button on the bottom left corner to open the page manage window, which looks like this:

page_abc_mgr

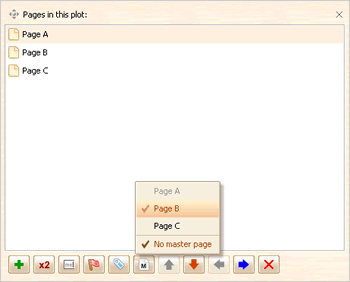
I will do it step by step, first I will select page A and click the master_page_button button to choose a master page for page A:

page_a_master

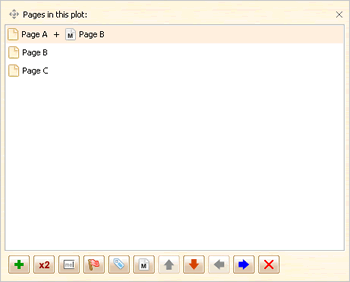
You can see the Page A item in popup menu is gray since you can not assign the page itself as its master page. I choose Page B, so page B becomes the master page of page A, you will see the page list is updated accordingly:

page_a_master_b

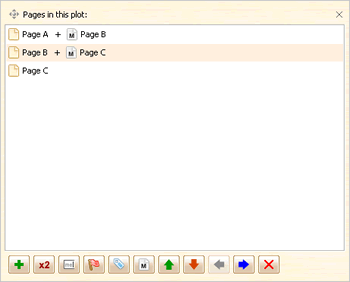
I will do the similar things for page B, assign the page C as the master page for page B, so finally we get:

page_b_master_c

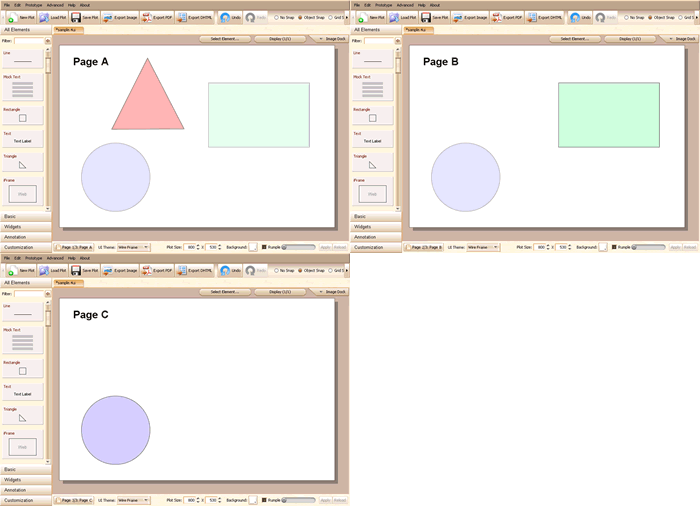
That’s it, we’ve created the hierarchy structure. We can switch pages to see what’s happen. The figure below shows the effect:

page_abc_masters

The content from master page will be displayed in a semitransparent channel, it is just a mechanism for reminding. When export the page to image or html, all elements will be treated in the same way. The figure below shows the html simulation for page A:

page_a_html

Make Good Use of Master Page

Although these three elements are on different pages, they can interact with each other via predefined actions, so there is no drawback to move the common part of multiple pages to a shared master page, this will significantly simplify your prototype / wireframe.

A very typical use case for master page is the header and footer of web site, each page of the web site has the same header and footer. You don’t have to copy header and footer then paste them here and there, you can just put the footer and header content on a single page, then assign this page as the master page for all other pages, that’s it.

ForeUI V1.75: Handy Element Selector

Hello everyone, today we just released ForeUI V1.75!   This update includes some small enhancements, and a very useful tool: Element Selector.

Handy Element Selector

When we are prototyping a very big design, we may meet difficulty when trying to pick a small element that covered by a lot of elements.  In V1.37 we provided a slider for hiding some elements that on top of the target elements, but when you are facing a huge number of elements on the plot, the slider may not be sufficient since you don’t know where to stop dragging the slider.  In this new version, we provide a very useful tool to help picking elements in plot.

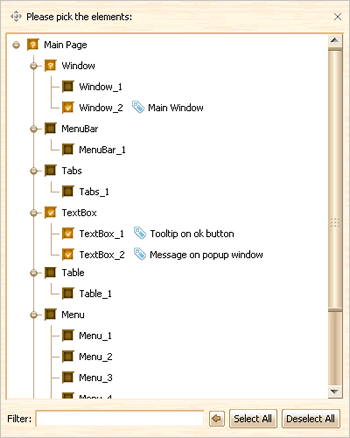
You can open this tool by clicking the select_element button above of the plot editing are.  It will list all elements of the current page and group them by their types, like this:

selector_all

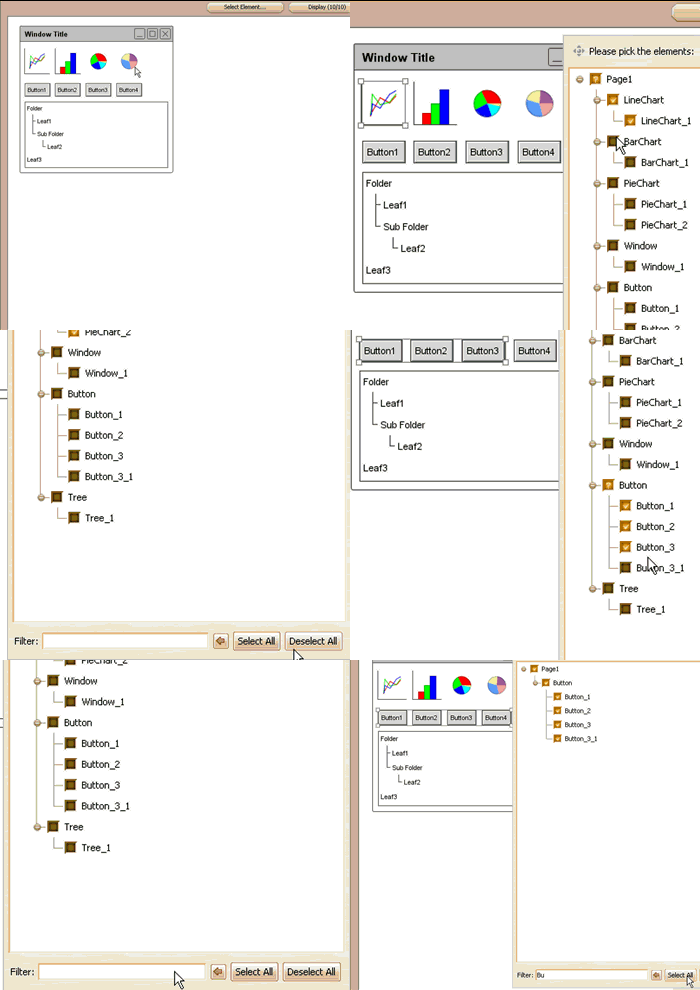
Each item has a check box so that you can check / uncheck it to select / deselect element.  What’s more, you can filter the content of the tree structure by inputing a keyword at the bottom, the elements will be listed only when their ids or notes content the keyword (case insensitive), thus you can find your desired element very quickly.  The animation below shows the way to work with the new element selector:

element_selector

This feature is requested by Ulrich, thanks for suggesting this useful feature!

Change Image More Easily

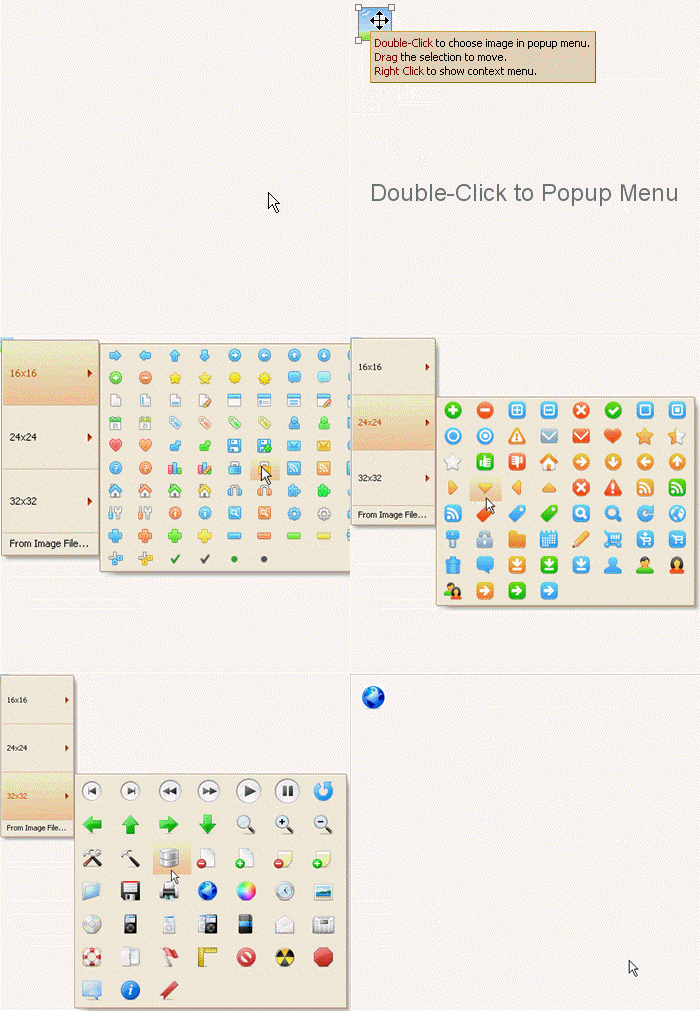
The image (or say image box) element is very frequently used, yet changing the image is not so easy in previous versions:  you need to click the browse_image button on the “Image” row in floating tool pane.  Now we’ve made an improvement: just double-click the image element and the popup menu will show up and allow you to select the image from image dock, existed icon library or external files.

The animation below shows the details:

image_editor

Some Enhancements:

  • Save image export settings in configure file.
  • Avoid launching multiple instances of application (Windows).

Fixed Bug:

  •  Bug_0110: Can not turn off Auto Resizing behavior for elements in group.