ForeUI is an easy-to-use UI prototyping tool, designed to create mockup / wireframe / prototypes for any application or website you have in mind.

All posts in Feature

Selecting Elements in ForeUI

Today’s topic is… selecting elements in ForeUI.  Seems I have nothing to write so I pick such an easy thing to introduce? Maybe and maybe not.  Have you noticed the “leading selected element”?  Do you know what is it for?  If your answers are “yes” for both, you can just ignore the content below 🙂

When we are creating mockups for our software or website,  we need to select elements very frequently.  Most people know that single clicking on the element can perform the selection, draging a rectangular bounds that contains multiple elements will select those elements at a time.  Did you know that we can press SHIFT key to select in “plus” mode? When you do this the cursor will be changed to arrow_plus1 and you can single click elements to add them into the selection.  Also you can press CTRL key to select in “minus” mode, the cursor will look like arrow_minus and you can single click elements that already within the selection to exclude them.

What’s more, there is a “leading selected element” concept in ForeUI. When you select several elements at a time, there will be an element that marked as “leading selected element”, which will have a dash line border with darker  color around it.  Take a look at the animation below, then you will know what I mean.  We can change the leading selected element by clicking another element within the selection.
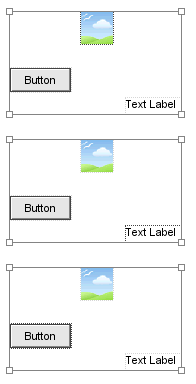
lead_sel

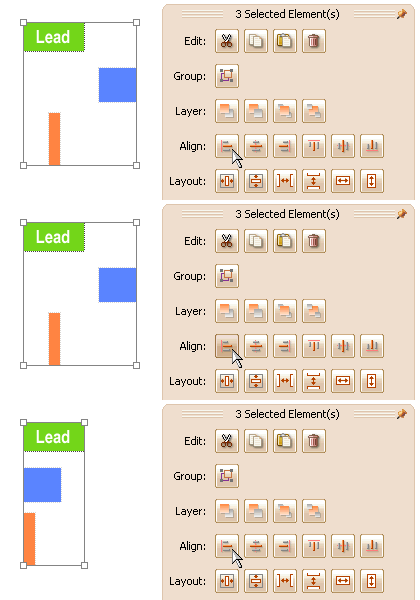
What is the leading selected element for?  First of all, it allow you to edit single element when you are selecting multiple elements.  You don’t have to cancel the big selection and select a single element for editing, you can just set it as the leading selected element, then work on it in the floating tool pane.  Secondly the leading selected element can work as the “reference substance” of some actions, it will be very easy to understand if you take a look at the animations below:
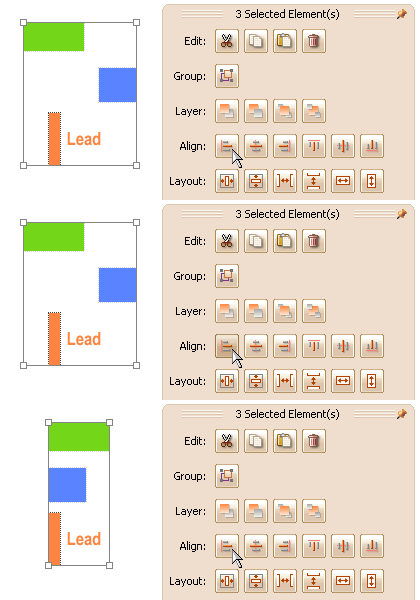
lead_align1

 lead_align2

ForeUI V1.05 Released!

Hello all, today we released the V1.05 of ForeUI!   This version bring us two new features:  multiple pages support and version checking.  Four bugs are also fixed in this version.

Multiple Pages

Now we can create several pages mockup within a plot.  You can click the pages button at the bottom to launch the pages management:

page_button

After clicking this button, the pages management window will popup:

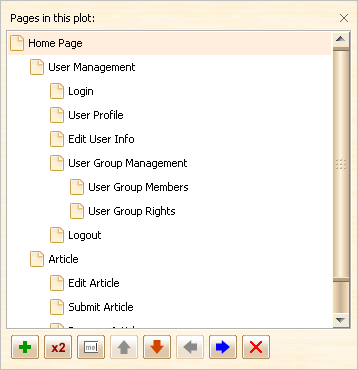
pages_dialog

We can add, duplicate, rename, move and delete the page here.  The pages can be organized with flat or hierachical structure.  The hierachical structure is very suitable for website mockups, since it looks like a site map.  This version also enclosed a new sample mockup: multipage.4ui.  It is a website mockup and contains 6 pages:


multipage_thumb

Update Checking

Now we can check the update from menu “About->Check Update…”.  Hope people check it frequently 🙂

Fixed Bugs

Bug_0030: The text editor may be trimmed.

Bug_0037: Floating tool pane may cover the selected elements.

Bug_0038: Image id display incorrect in floating tool pane.

Bug_0040: Elements should be aligned to the lead selection.

Batch Changing Image Reference

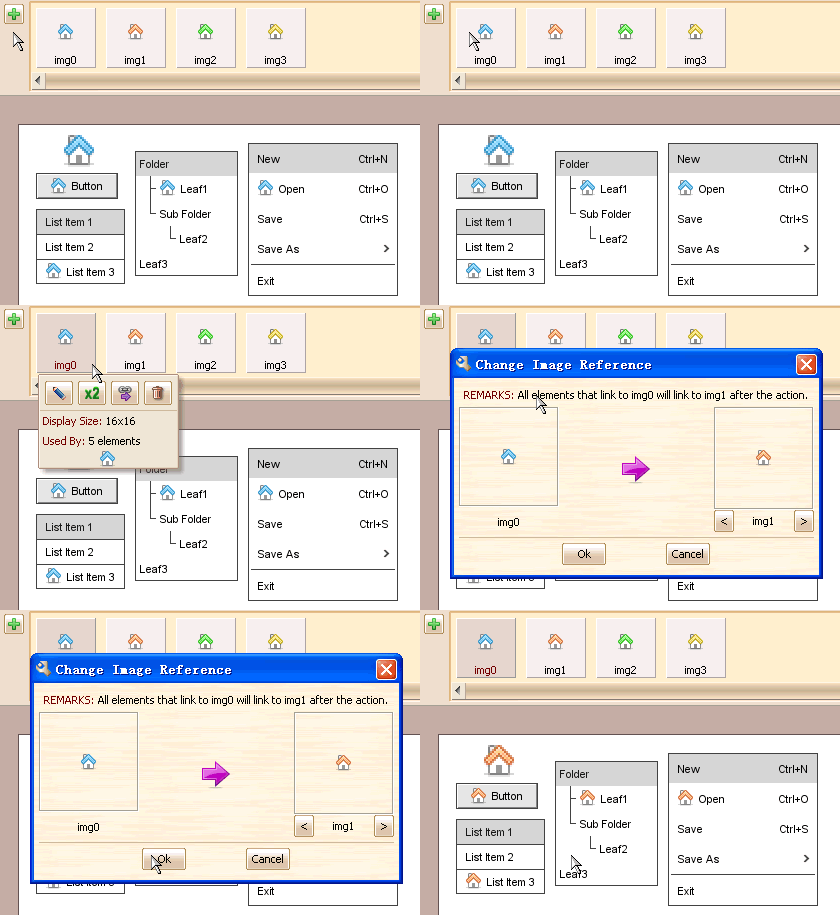
Today I’d like to introduce an interesting feature in ForeUI: batch changing image reference.  Sometimes we have used an image a lot in a plot, but want to change it to another image.  How can we achieve that?  Changing the image reference one by one?  It works but very time consuming.  In this case we need to use the batch changing image reference feature in ForeUI.

Let’s expand the image dock by clicking the  button, then click the image that we want to change, a popup menu will be shown and we can find a  button on it, then we click it and choose the target file we want to change to, that’s all.  The GIF animation below shows the details:   change_img_link
Mac OS X UI Theme Preview

The development of Mac OS X UI theme is finished and we are testing on it.  Now let’s have a preview first:

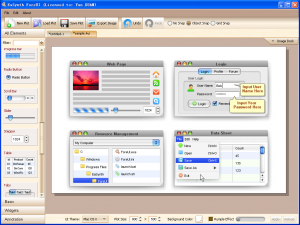
mac_os_x_theme

We believe this kind of UI themes are very useful when making design document, since it is very close to the final result, developers can follow up and implement the UI with its help. 

The Mac OS X UI theme will be available in the offical version 1.00, which will be delivered next week.

Using Images in ForeUI

1

When we create UI prototype for our product with ForeUI, we may need to use some images (for example, icons in menu).   ForeUI provides a very flexible and easy way to manage the images within the mockup, there is an “image dock” for every mockup, which will maintain all used images. 

The image dock is hidden by default, since we don’t need to work on it directly  in most cases, but it is working silently  in the background.  It just like a storehouse, caching all images that used by any element.    Each image in the dock will have its own identification, any element that use this image is actually link to its identification.   For example, a button use the image with “img1” identification as its icon,  you can insert the “[img1]” at the beginning of its text, and ForeUI will recognize it and show the image as the icon of button.

edit-button-text1

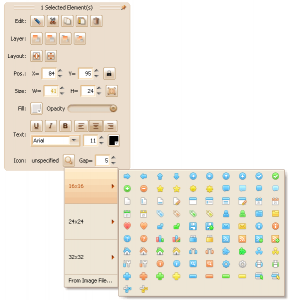
Yes we can input that “[img1]” in the button text to assign an icon for it, but we don’t have to do so,  since we have more convenient approach:  specify the image in the floating tool panel, see the figure below:

specify_image

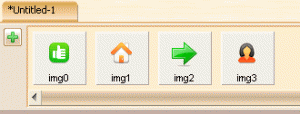
We don’t have to understand how the image dock works, we just choose the image we need, ForeUI will take care of all the rest.  We can check the image dock at any time, just click the “Image Dock” button on the top-right corner of the plot, we can see all used  images:

 imagedock_list1

You can single-click each image in the list to see what can we do on it, also you can double-click it to make some processing on the image.  Remarks:  Once you make change on the image, all elements that use this image will be updated automatically.